In this brief Photoshop tutorial I will show you how to create animated smoke using free fog Photoshop brushes.
Photoshop Tutorial Prerequisites
For this tutorial you will need only one thing: the fog brush Photoshop pack that you can download for free from Photoshop Supply.
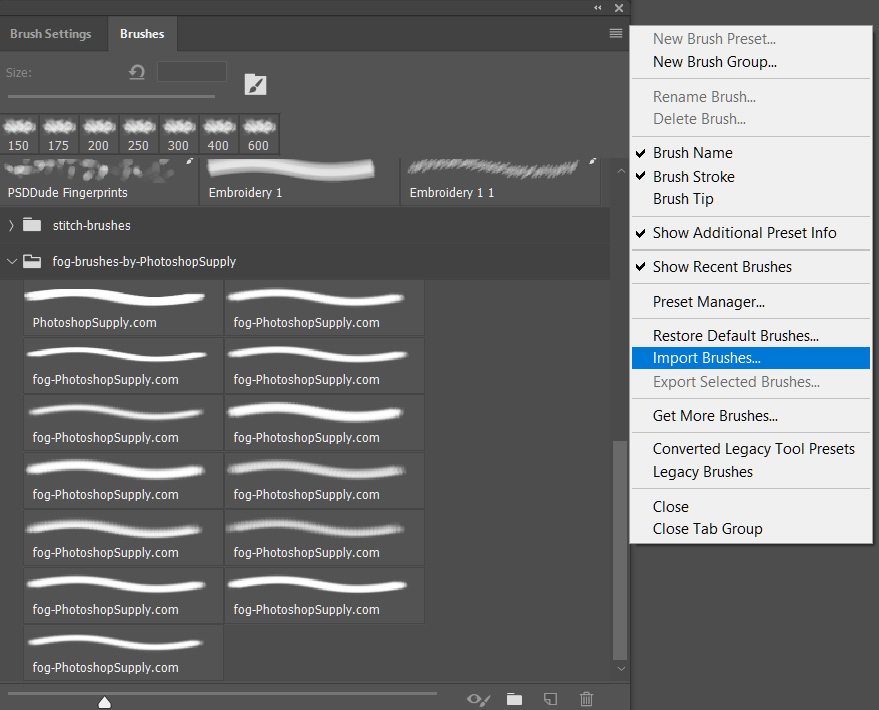
Step 1 - Install the Fog Photoshop Brushes
After downloading the ZIP file and extracting it to your local computer you have to install the ABR brush file into your Photoshop.
There are several ways to do that, but the easiest is to simply drag and drop the ABR file over the Photoshop window. Alternatively you can go to Window > Brushes and from the top right menu choose Import Brushes.
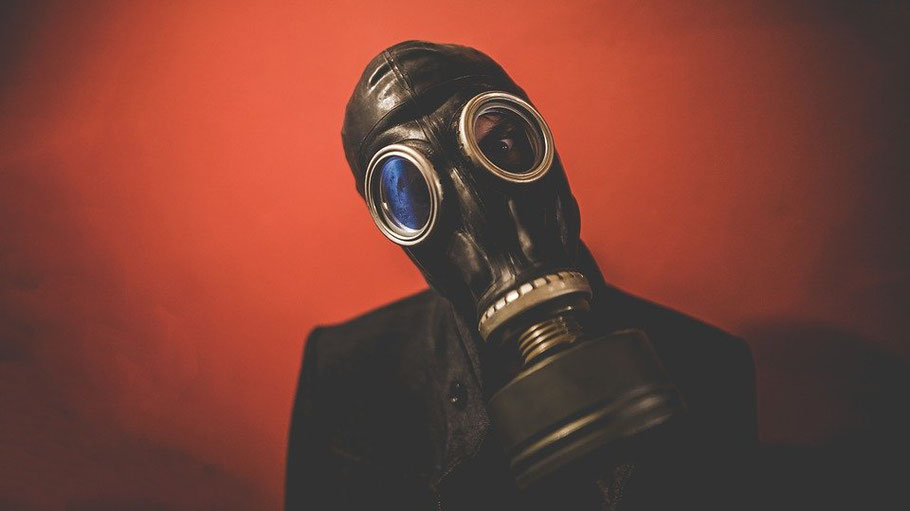
Step 2 - Open the Starting Image
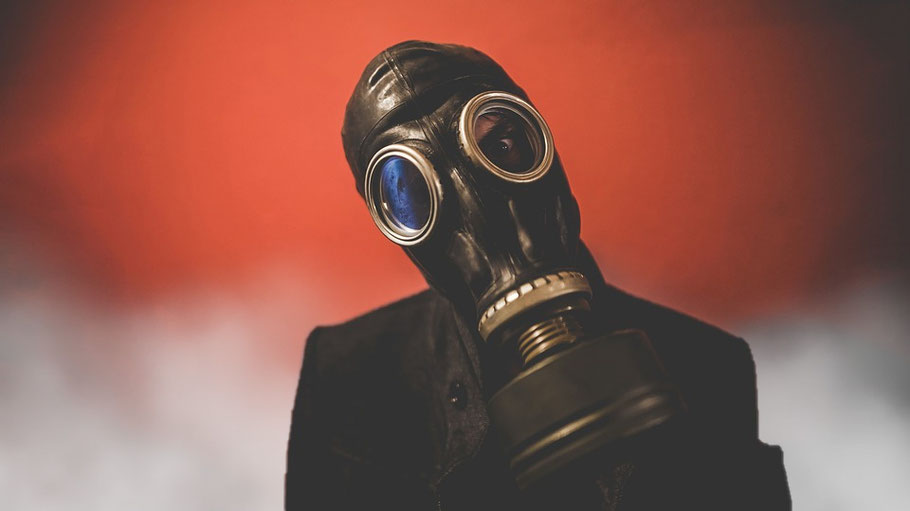
For this Photoshop tutorial I will an image that you can download from Pixabay and open in Photoshop.
Step 3 - Add Background Fog
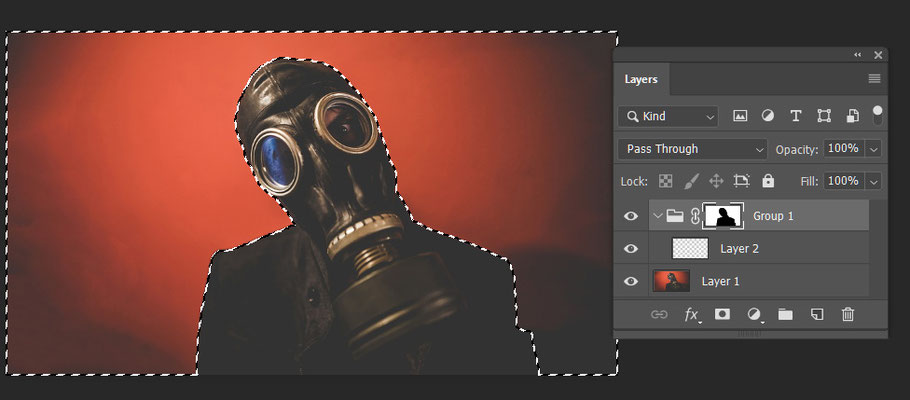
We need to separate the background from the foreground. Fortunately, Photoshop CC offers a quick way to do this. Simply select the photo layer, go to the Magic Wand select tool and press the Select Subject button in the top menu. This will select the guy with the gas mask.
Create a new empty layer (CTRL+N) and make a group with itself (CTRL+G) then add a mask. Because there was an active selection, this will be transformed into a mask for the group.
We need the group to draw the fog in the background using our fog brushes. But, the mask created is the opposite of what we have. So, select the mask and invert it to allow us to draw in the background and avoid the area where the gas mask guy is.
Here's what you should get:
Select one of the fog brushes installed earlier and start drawing in the layer inside the new group. You can use any color you want for the smoke, but you can also start with white and we will colorize the smoke later using a Gradient Map.
After drawing you should get something like this:
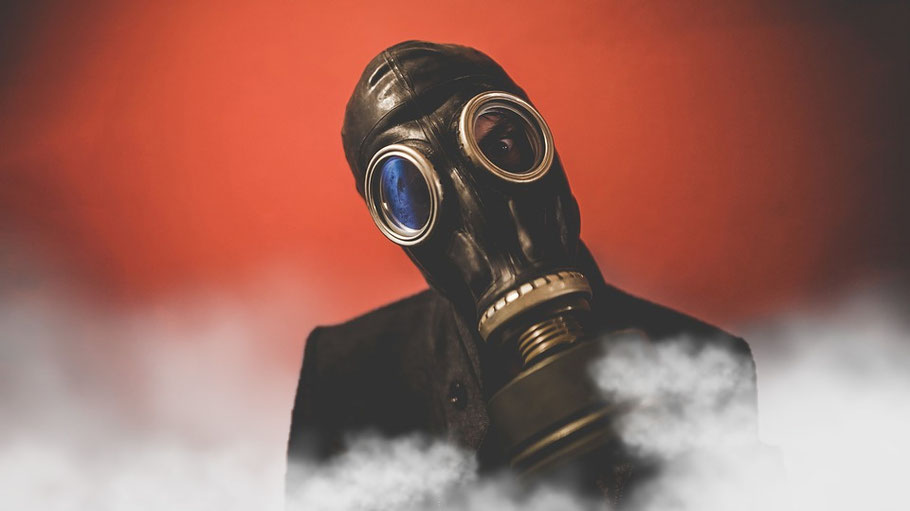
Step 4 - Add Fog in the Foreground
Create a couple of new layers above the group with the mask and start drawing using the fog brushes over the image. Use different sizes and maybe different brushes from the fog brushes Photoshop pack.
Here's what I got after drawing with the fog brushes:
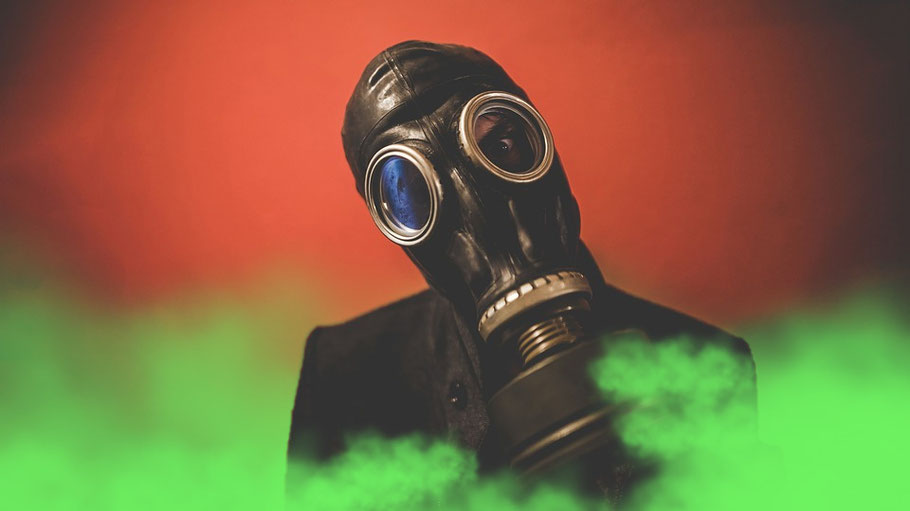
Step 5 - Make Toxic Green Smoke
Let's colorize the fog. I decided to go with a toxic green, but you can choose any other color you want.
In fact, the technique we will use allows changing the color very easily afterwards.
First, group all the layers containing the smoke/fog. Then, add a Gradient Map adjustment layer above the group and click the Create Clipping Mask button.
The Gradient Map changes the colors from black through white into the colors you select in the color ramp. For the toxic green smoke I used two color stops: #6ecf2d to #6df463.
Step 6 - Create the Animated Smoke Effect
The image already looks great and you can use it as is. But, if you want to take it further, and get the same effect as in the preview, we can add the animation.
Simply duplicate the layer with the foreground fog. Then open up the animation tab using Window > Animation, then enable the Video Timeline.
Add keyframes for Transformation and for Opacity to make the smoke/fog seem rise up and disappear.
That's it!
